Importing resources
Importing resources is the process of bringing externally created digital assets into a Crown project. Imported resources such as models, textures, sound files etc. are processed by Crown and made available for use in Levels, Units, and other project content.
Drag-and-drop
The quickest way to import assets into a Crown project is to drag-and-drop files from your file manager into the Project Browser. Crown will detect the resource types automatically and open an appropriate importer dialog so you can fine-tune import options.
Import via Project Browser
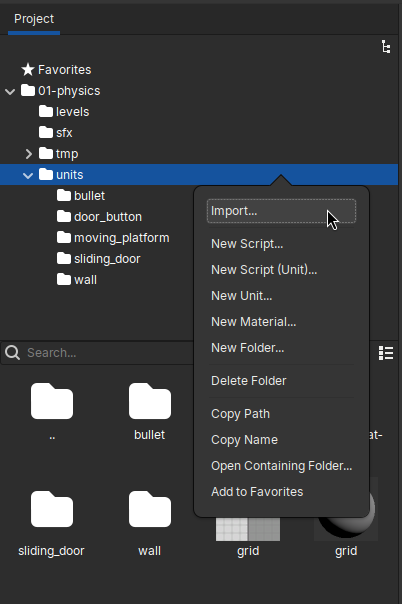
Importing resources via the Project Browser context menu.
You can also import files from the Project Browser. Navigate to the target
folder, right-click the folder, and choose Import... from the context
menu. Crown will present a file picker:
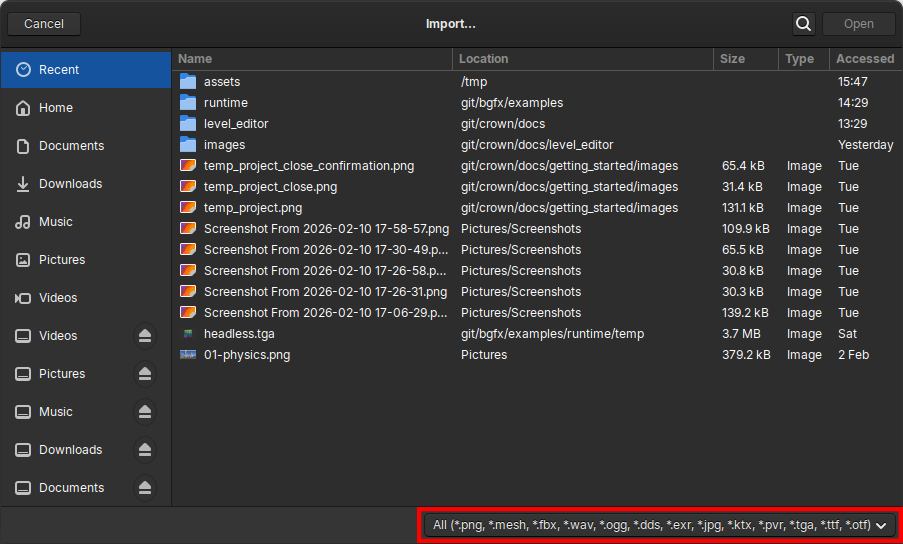
The Import dialog for picking files and choosing the resource type.
This method is useful when you want more control: the Import dialog lets you
choose how Crown should process the selected files. That matters because the
same file extension can sometimes map to different resource types
(for example, .png files can be imported as textures or as sprites). Use
the resource-type selector to pick the desired resource:
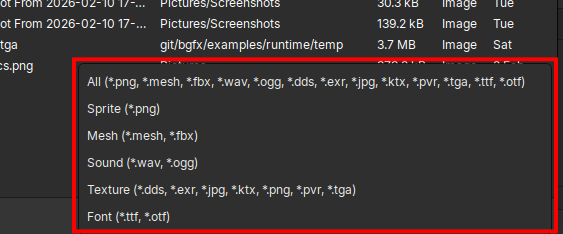
Selecting the resource type in the Import dialog.
Import via Command Line
When importing from the command line, the editor automatically selects the
appropriate importer based on file extensions. Use --as to select a specific
importer when an extension supports more than one resource type. For example,
import a PNG as a sprite with:
./crown-launcher editor --source-dir $CROWN/samples/01-physics --import hero.png units/hero --as sprite
The destination path is relative to the project source directory. See the
command line reference for --import
syntax and the list of supported importer types.